After you have installed the KubeClarity backend and the KubeClarity CLI, complete the following tasks to see the basic functionality of KubeClarity web UI.
Runtime scan
To start a runtime scan, complete the following steps.
-
Open the UI in your browser at http://localhost:9999/.
-
From the navigation bar on the left, select Runtime Scan.

-
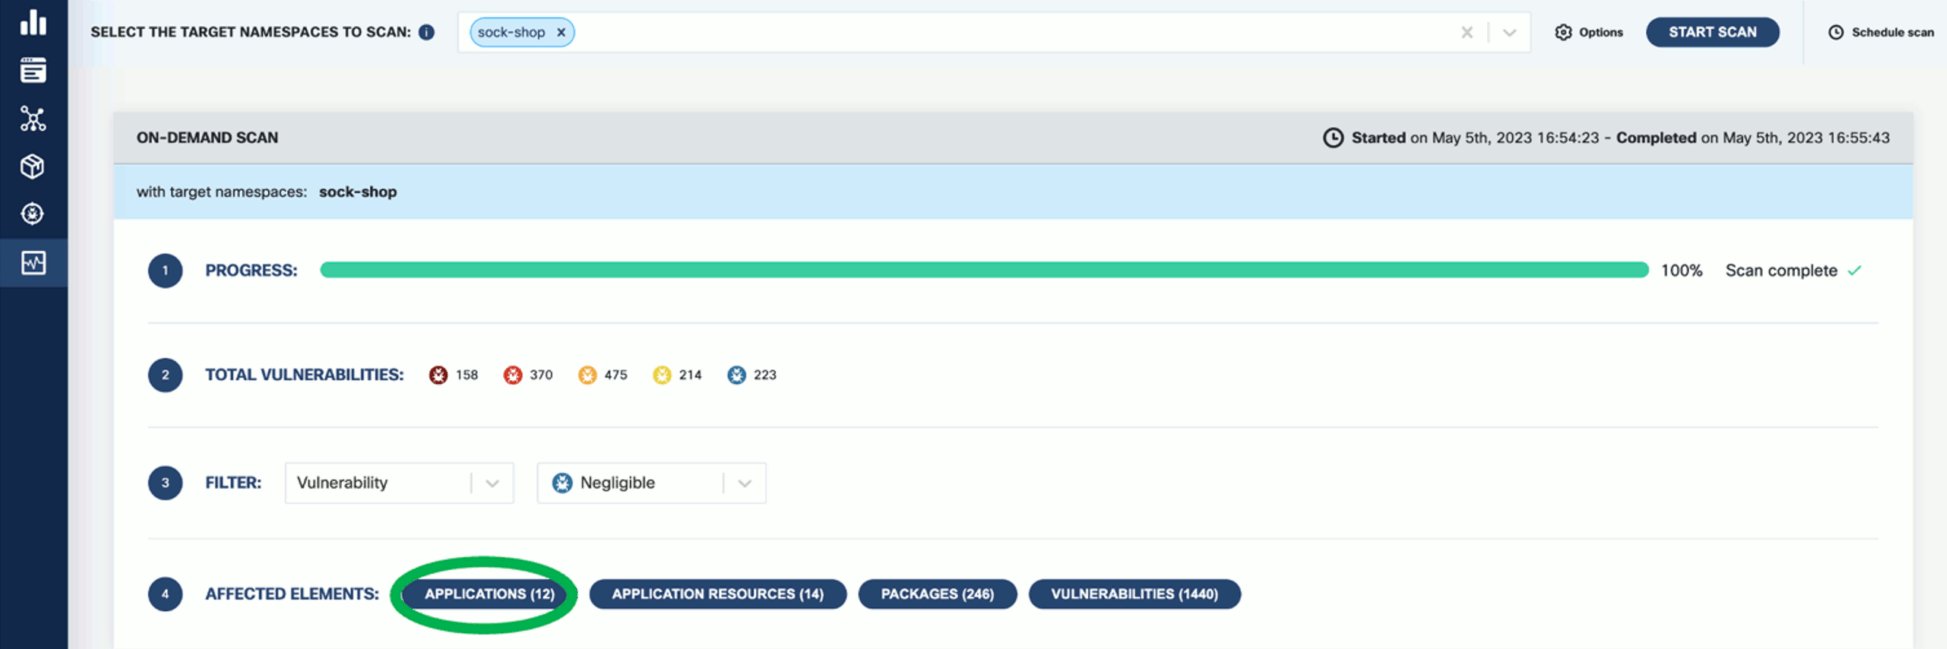
Select the namespace you want to scan, for example, the
sock-shopnamespace if you have installed the demo application, then click START SCAN. You can select multiple namespaces.
-
Wait until the scan is completed, then check the results. The scan results report the affected components such as Applications, Application Resources, Packages, and Vulnerabilities.
-
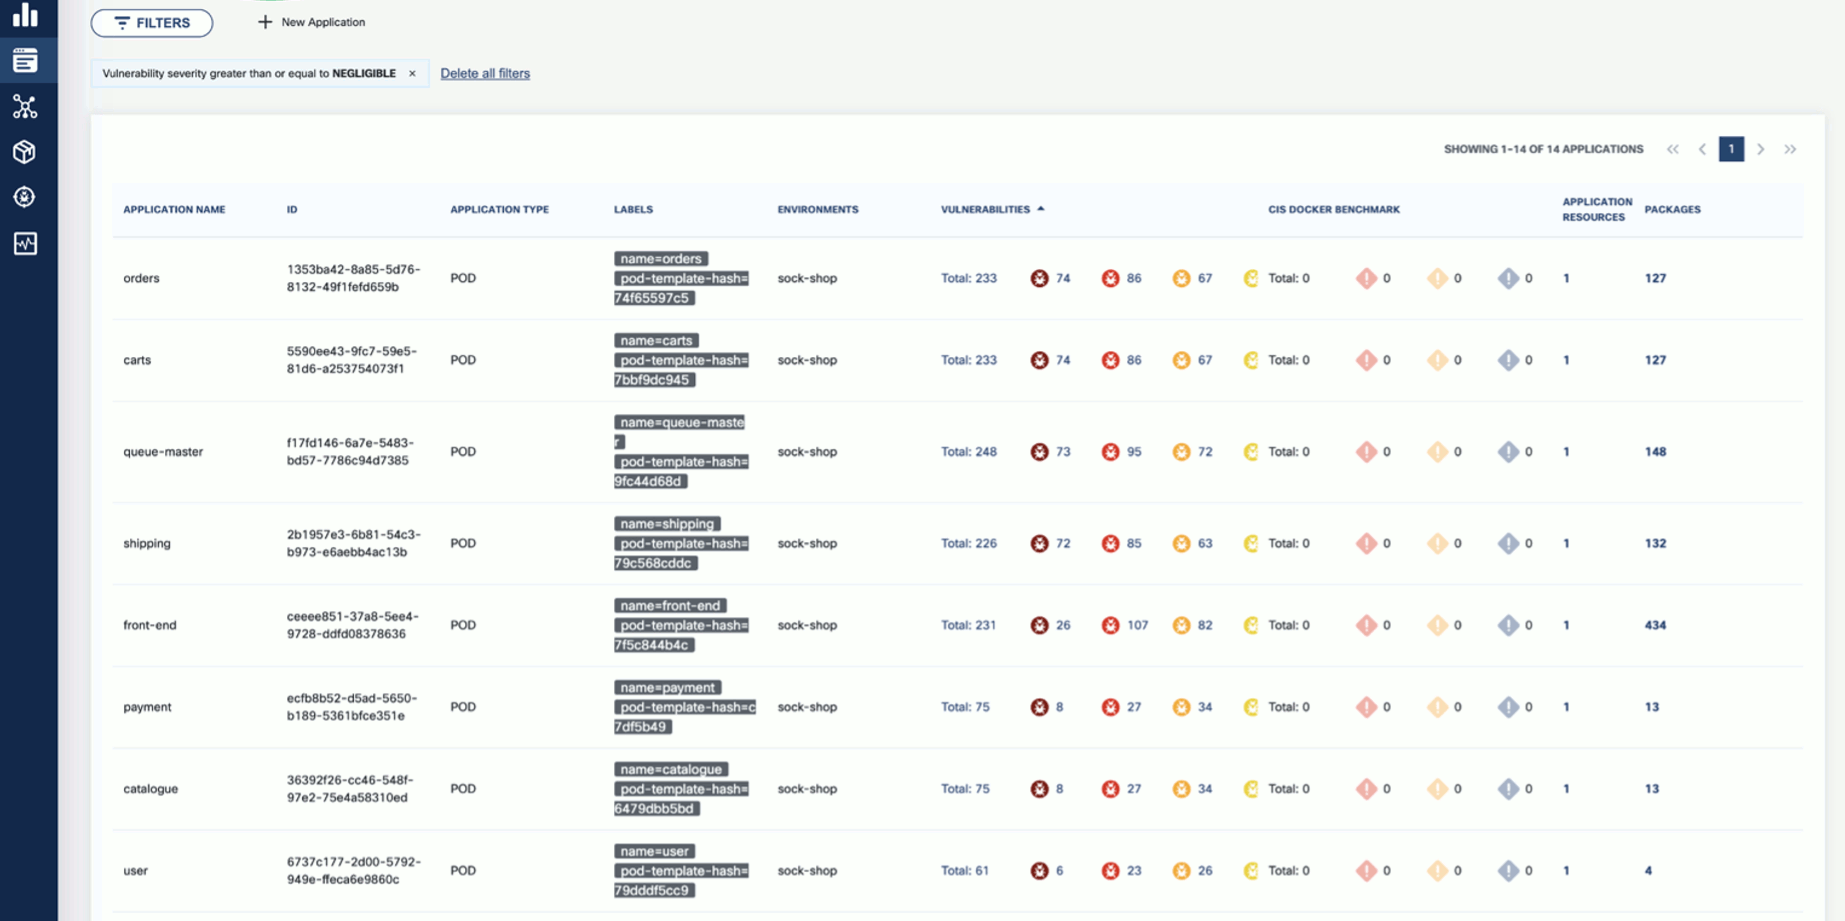
Click on these elements for details. For example, Applications shows the applications in the namespace that have vulnerabilities detected.
-
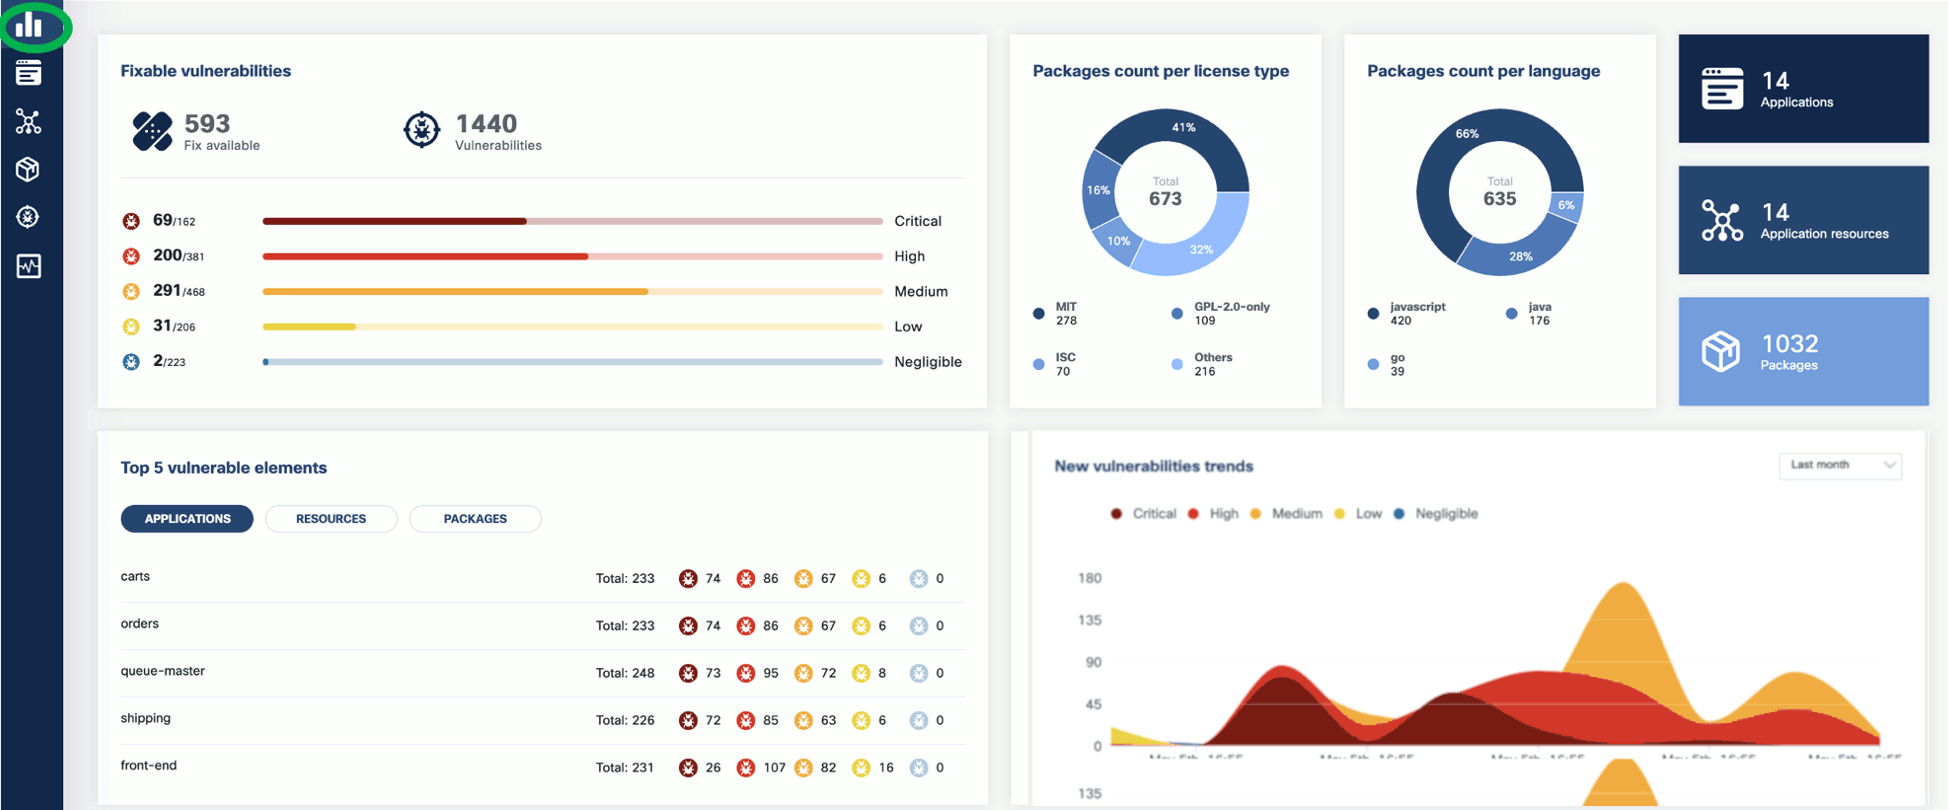
Now that you have run a scan, a summary of the results also appears on the dashboard page of the UI.
Vulnerability scan
-
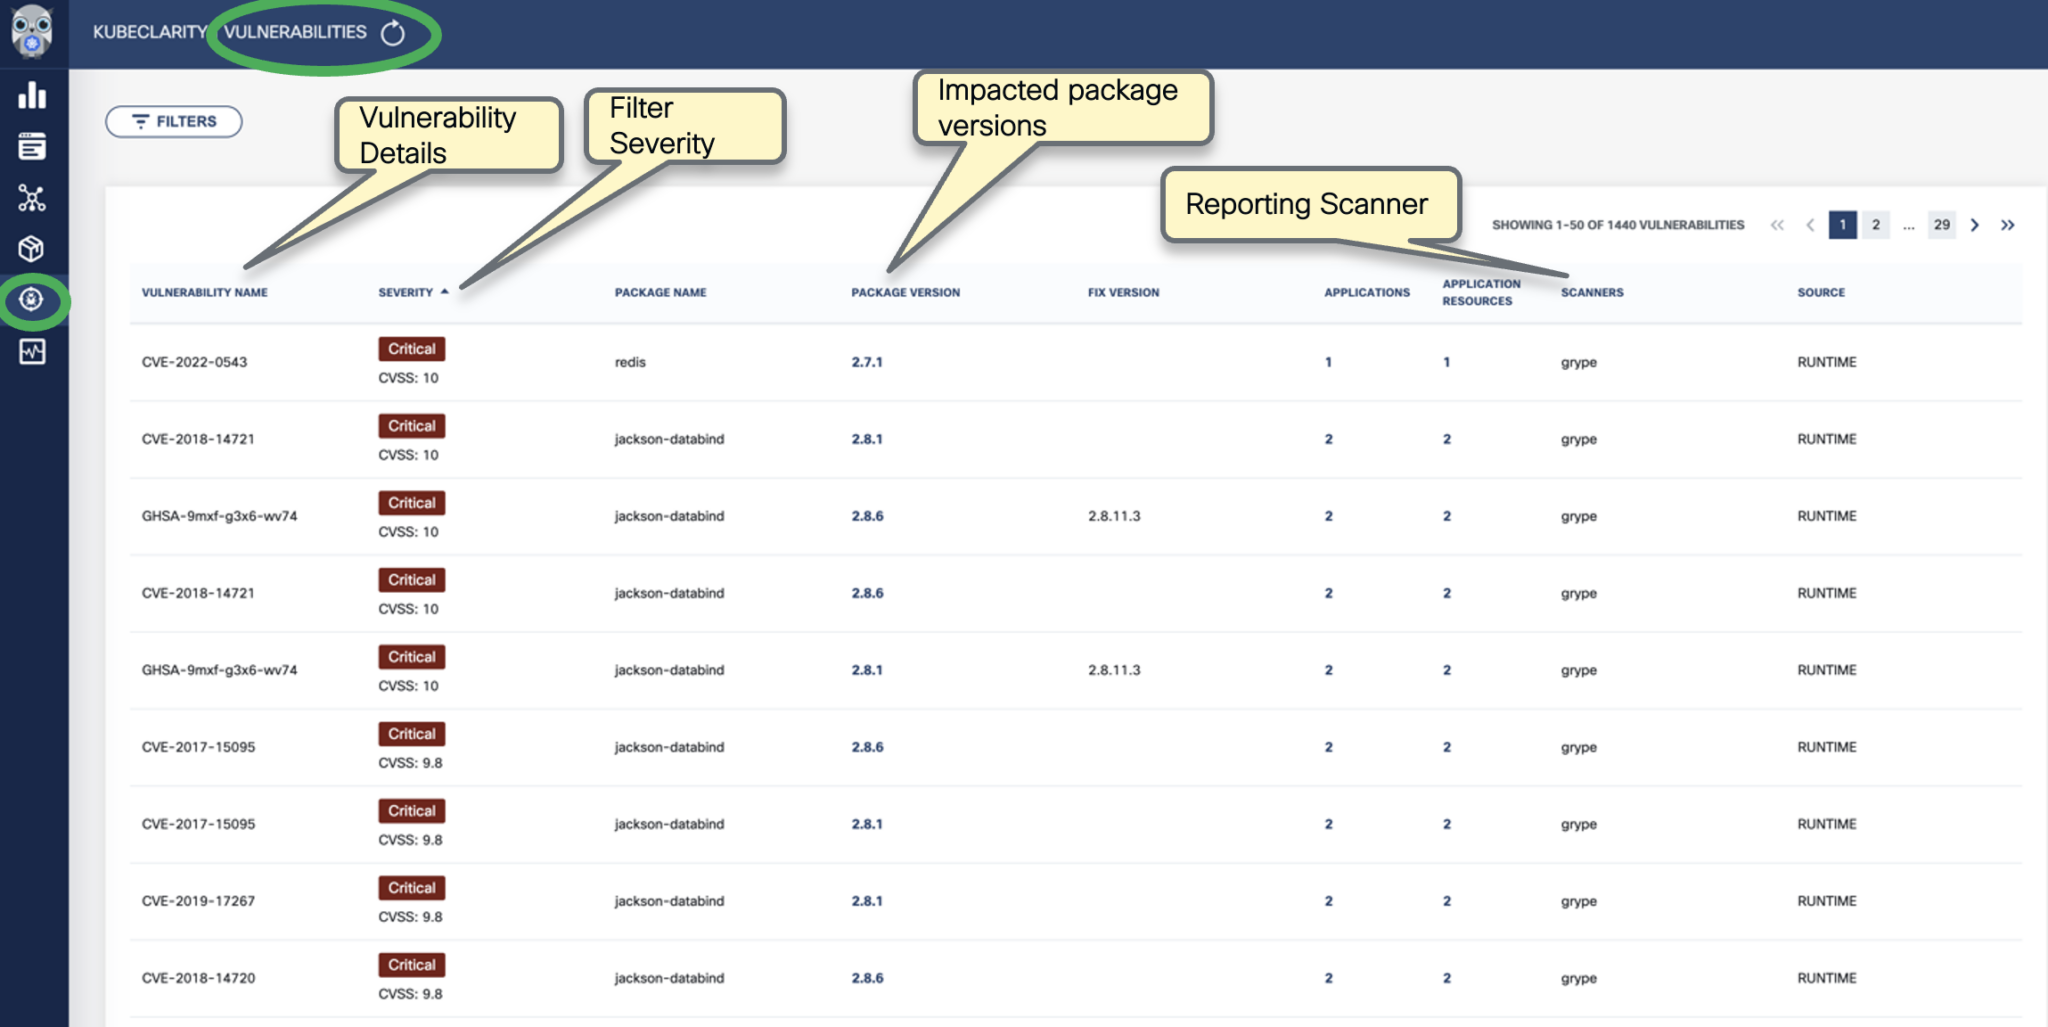
To see the results of a vulnerability scan, select the Vulnerabilities page in KubeClarity UI. It shows a report including the vulnerability names, severity, the package of origin, available fixes, and attribution to the scanner that reported the vulnerability.
-
You can click on any of these fields to access more in-depth information. For example, click on the name of a vulnerability in the VULNERABILITY NAME column.
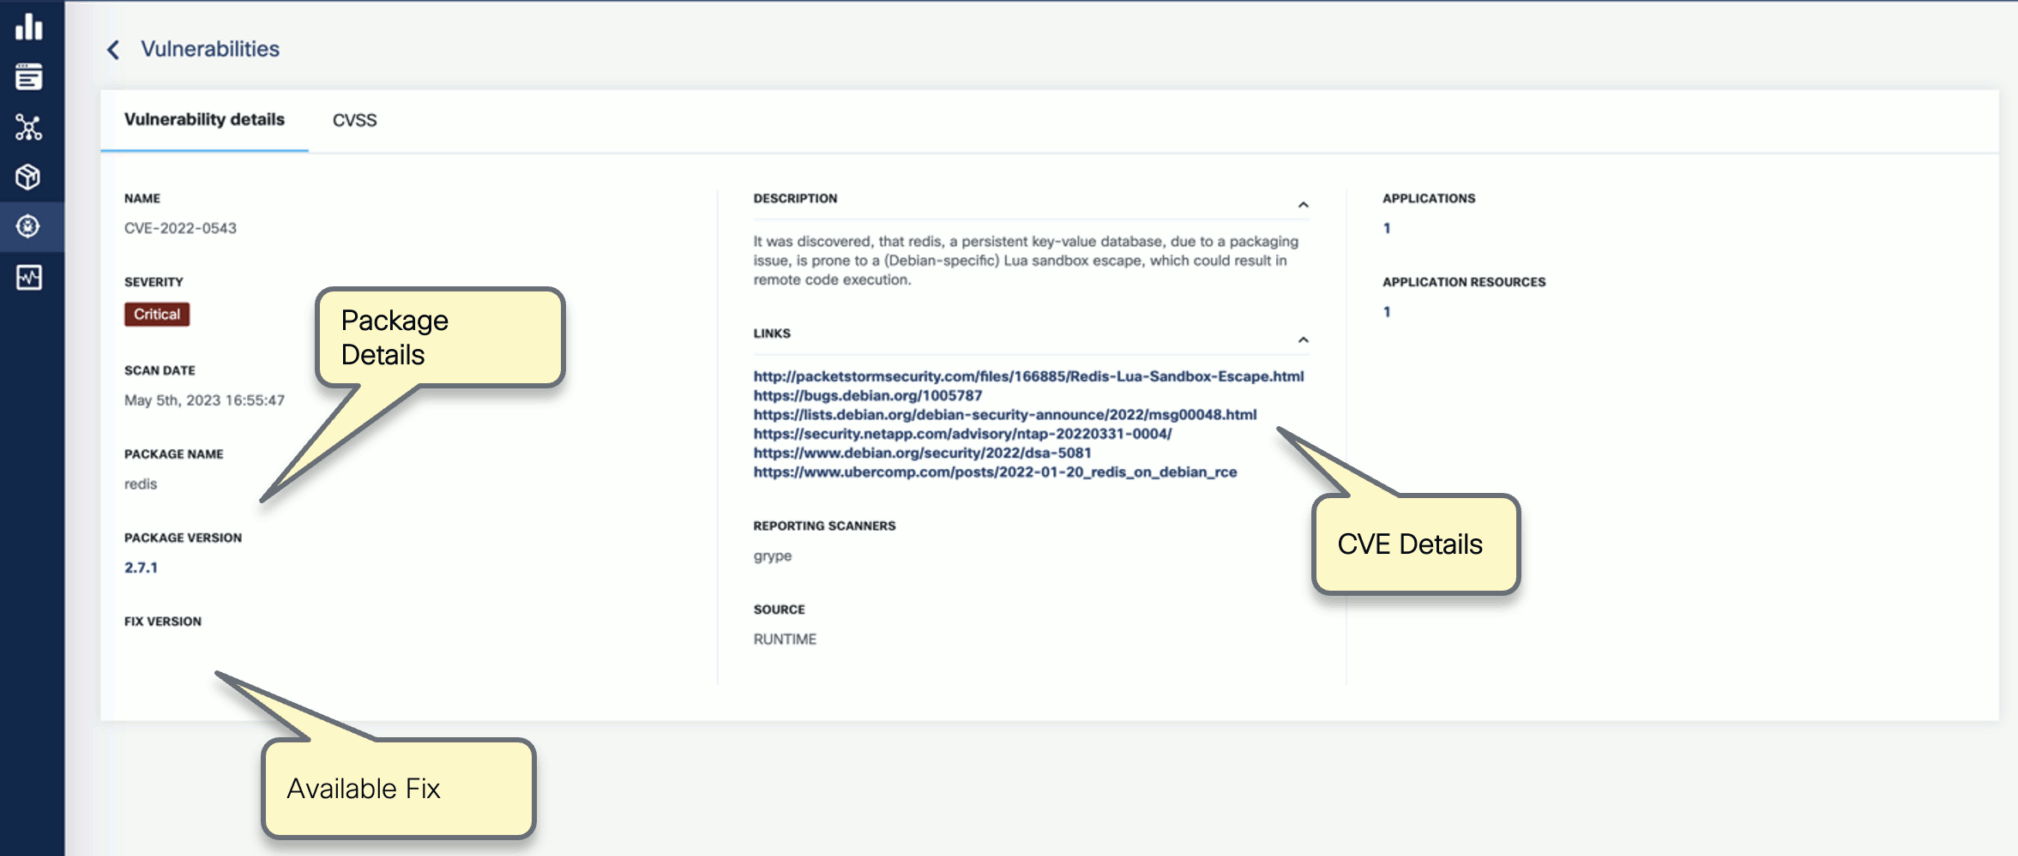
-
Select CVSS to show the CVSS scores and other details reported from the scanning process.

-
Navigate back to the Vulnerabilities view to explore the filtering options. Filtering helps you reduce noise and improve efficiency in identifying and potentially fixing crucial vulnerabilities.
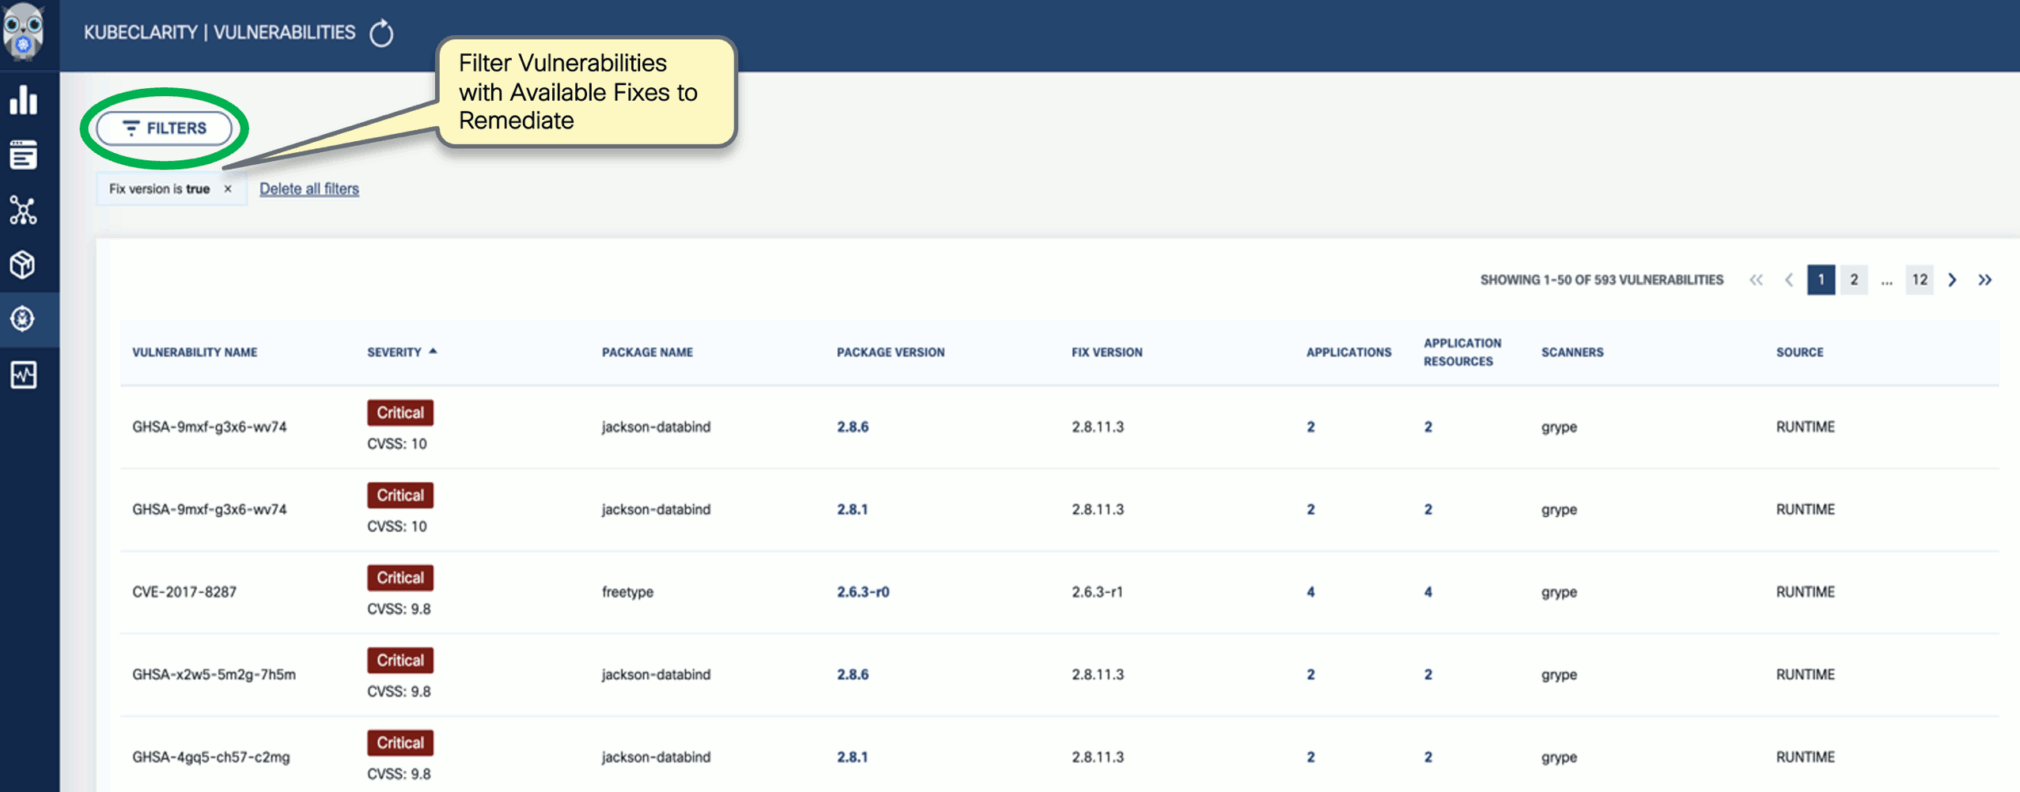
-
The KubeClarity Dashboard gives you insights into vulnerability trends and fixable vulnerabilities.

Next step
Check the common tasks you can do using the CLI tool.